Author Archive
NextGen Gallery in WordPress – How do I change the size of my Image Gallery?
If you choose image browser from your NextGen menu in a post, it will default to full width of the column (570 pixels wide In my case) this means vertical photos will be bigger as they will stretch to that width and maybe not look as nice.
If you wish to bound any object in WordPress or on the web, tables a good way to do this as the object in question can not exceed the bounds it’s given to live within.
after inserting your code for the imagebrowser you get:
(imagebrowser id=4) except square brackets
try wrapping it in a center wrap and a table wrap with a limiter width on the table.
<center> <table width=”320″> (imagebrowser id=4) </table></center>
now your imagebrowser will be 320 wide and centered.
For slideshows, if you wish to change the size of those throughout your site, you can select options from the NextGen gallery menu on the left menu bar in WordPress.
then you can select slideshow and change the size of your slideshow window.
I recommend you resize your photos for a multiple of the default slideshow size.
If your slideshow default size is 320×200 Pics can be 640×480, 940×680, 1024×768 this way your slideshow pictures won’t be fuzzy.
If the second window is not smaller, Check it out with firefox or chrome, This theme has a weird buggy table issue in IE I’m working on it.
[imagebrowser id=1]
Here it is bound to 320px
| [imagebrowser id=1] |
Update of death – Vista… !!0xc01a001d!! 37398/94614 (\Registry\Machine\Components\deriveddat…)
Had a customer today with the update of death for Vista. I searched thousands of articles about this without finding a suitable solution, I thought I’d put this in my blog.
Computer boots up and freezes, upon running start up repair I get:
!!0xc01a001d!! 37398/94614 (\Registry\Machine\Components\deriveddat…)
and the computer locks up.
Computer won’t boot, even in safe mode.
My research shows that the error is due to a log file jamming up. This is caused by something in the update process not going right.
I think it’s funny that if windows can’t complain to the log, it can’t continue to fix any problems.
So, to fix this problem here were my steps:
I booted a linux cd (Click to download Knoppix or Click to download Ubuntu)
The c: drive had 2 partitions /dev/hda1 an/dev/hda2
- I right clicked, mounted the hda2 partion on the desktop.
- Right clicked the hda2 changed it to write mode (If you generate an error saying windows did not shutdown cleanly: sudo ntfsfix /dev/hda2 then repeat steps 1 and 2.)
- I double clicked on the hda2 icon (or open nautulus /mnt/hda2)
- browse to the WINDOWS folder.
- Right click and rename the SoftwareDistribution folder (or alternatively copy it somewhere and delete it)
- Browse to the system32 folder
- Right click and rename catroot2 to catroot2.old
- Click the start gear and click logoff, shutdown
- Pull the Knoppix cd-rom from the drive.
- Boot from the hard disk and select startup repair.
This should get you to the point where windows Vista will run a repair and complete and reboot.
I would recommend you backup your data to an external hard disk and then reformat the computer and setup from scratch as we are not certain what went wrong and don’t want to have to do this again in the future.
How to delete a stuck print job. (Generic instructions.)
Here’s the situation, You’ve printed and the print job is stuck, rebooting won’t help, and nothing else can print until you kill the print job.
Here are the generic instructions:
1. Stop the print spooler (The files are locked until you stop the print spool service)
Start, Settings, Control Panel, Performance & Maintenance, Administrative Tools, Services, Print Spooler, Stop
2. Manually Delete the print Job from the printer queue. (Gets rid of the pesky print job)
Start, My Computer, C – Drive, Windows (Show these files), System32 (Show These Files), Spool, Printers.
Delete all the files in C:\windows\system32\spool\printers\*.*
3. Start the print spooler (So that you can start printing again (You can just reboot instead of this step))
Start, Settings, Control Panel, Performance & Maintenance, Administrative Tools, Services, Print Spooler, Start.
So now it’s as easy as 1,2,3 to fix this problem for you please share the information with friends so that they won’t be tearing their hair out if they get a stuck print job.
These instructions will work with windows XP, Vista, 7, or older versions of windows as well. Some of the steps may vary slightly depending on the version, but the instructions will give you a guide to getting you out of your jam.
Free Full Backup software frome EASEUS!
 Need to do a full backup? Don’t know where to turn?
Introducing EASEUS Todo Backup from the EASEUS data recovery software company.
Easy to use, just plug in an external drive and zap all your entire drive to the external.
Restoring is as easy as booting up a windows PE disk Click here to learn how.
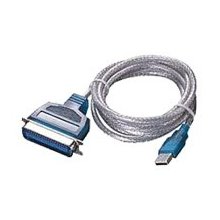
Alternatively you can restore from another computer to a new hard disk plugged into a USB-IDE adapter.
The nice part is the software is simple to use, very very effective and will restore the entire disk (OS included) to a new hard disk. I Highly recommend this product.
You can download the EASEUS Todo Backup 1.1 here.
View a slideshow of how to install Todo Backup 1.1 here.
Click below for the youtube version of the install procedure.
How to securely shred your whitepace on your devices/drives for free.
Why would you want to do this? Maybe you’ve been browsing nefarious sites and don’t want the boss to know? Maybe you are donating the computer to a friend and don’t want them reading your diary? Simply erasing the cache or the data on a computer does NOT delete the files beyond recovery. All those files can still be recovered with simple software and may be exposing your personal data to attack.
Lots of programs out there will allow you to shred your old drive, this method will work for free and will also work on your whitespace (deleted files).
First, check the health of your disk, I recommend using hdsentinel, Click Here to download hdsentinel.
Now that we know that the drive in question is healthy you should download truecrypt. click Here to download truecrypt.
Warning: This procedure will make any deleted files unrecoverable period.
To shred all the whitespace on your primary drive:
- open my computer and check the size of your free space on the drive.
- open truecrypt, create a volume,encrypted file container, Standard volume,name the file on the drive in question. (I used C:\junk.tc)
- Make the file the size of the available drive space.
- for the password use whatever long password you wish. type it in again to confirm.
- move the mouse around in the window and then click format.
- This process will take a long time if the drive is big.
- when the process finishes, close truecrypt and delete the file (C:\junk.tc)
- You have successfully shredded your whitespace beyond any recovery.
Warning: This will make all data unrecoverable on the disk you specify,
please use the instructions with care.
To shred your old hard disk (After you’re sure you have everything you needed off of it):
Plug in your old hard disk into the new computer using a usb-ide adapter.
- Open Truecrypt
- create a volume
- create a non system partition/drive, standard encrypted volume, select the drive
- put in a long password twice
- move the mouse around in the window and click format.
- This will take a while depending on the speed of the USB and the size of the drive.
- unplug and format the drive in windows if you wish. There will be nothing left on it to recover.
Hope this helps you destroy your deleted data or your old hard disk so nobody can recover anything from your old computer.
How to fix malware 101.
So, you’ve been infected with malware and can’t hardly use your computer?
I recommend Malwarebytes if you can use it and the malware will allow you to run the program, but what if you cannot?
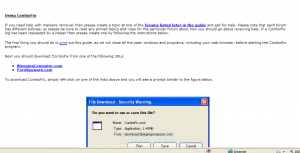
Download combofix from Bleeping computer and put it on a flash drive, log out and login as administrator if you can and run combofix from the flash drive. There’s tons of good malware advice on the bleepingcomputer.com webite.
Again, here’s the link for combofix.
Scroll down and click on the bleepingcomputer in blue to download the fix.
This can take some time but the results are well worth the effort and may restore your computer from the malware infection.
Found a great method to block 90% of ads with IE
 http://www.dslreports.com/forum/r22124619-IE8-InPrivate-filter-from-adblock-plus-list
http://www.howtogeek.com/forum/topic/block-ads-in-ie8?replies=2#post-109863
The above link explains everything, one of the new features you can take advantage of in IE8. I have tested this with windows xp, windows Vista and Windows 7 and it works beautifully. Hope this save you viewing a bunch of ads.
How to Handle Boot Sector Corruption using windows.
I just ghosted my vista laptop 120 Gigabyte hard disk over to a brand new 640 Gigabyte SATA drive and the laptop just reboots and never shows the vista boot screeen?
Answer:
If you boot the vista boot disk up and fix the boot with advanced options, I it will repair the boot sector and allow Vista to load. Alternatively, you can boot the windows XP cd to command prompt only and run fixboot.
Running fixboot from a windows XP cd will also wipe any boot virus out, if you ever get one that erases your boot sector, or just infects it.
How do I recover from a home NAS (Network Attached Storage) box?
I have an Iomega Home Media Network Hard Drive, 1TB, and lately I can’t access the data on the drive. The shares (both built-in and created by me) are there, the security works, but when trying to access the data I get a “The network path was not found” message which is worrying, to say the least.
I’d like to know if there is a way to get the data off the disks somehow, as some of the data in the drive
Answer:
I’d download ubuntu, burn a CD-rom and boot it up and plug the drive into a USB to IDE converter and set the drive on your desk and once linux is booted, plug the drive in and see if it mounts.
Many of these devices are running linux, so you may need to boot off of a linux boot disk to mount the media.
DO not attempt to fix the data if it does not mount. Don’t use fsck, or chkdsk.
If it does, grab your data, if not email me using the link below.


